Skip to content
GENSHIN-BUILD.COM
Sayu — Anemo Claymore character | Genshin Impact

Shuumatsuban

Sayu

Build guide · Genshin Impact

4-star
AnemoClaymoreHealer

Mujina Ninja

The best Sayu build in Genshin Impact (Version 7.0) is Skyward Pride with Desert Pavilion Chronicle, ATK% sands, ATK% goblet, Healing Bonus circlet. Updated August 22, 2026

How this build was derivedSayu’s kit multiplies ATK, read from the scaling rows on the Elemental Skill and Burst rather than from the ability prose. Weapons and artifact sets below are ranked on whether their stat and their passive text act on that stat. This is a reading of the game’s own numbers, not a community tier consensus — a set that wins a niche team composition will not show up here.

Weapons

Also works: Wolf's Gravestone, A Thousand Blazing Suns, Blade of Atonement, Earth Shaker

Artifacts

Main stats

Sands
ATK%
Goblet
ATK%
Circlet
Healing Bonus

Substat priority

  1. 1Energy RechargeBest
  2. 2ATK%
  3. 3CRIT Rate
  4. 4CRIT DMG

Talent priority

  1. #1

    Elemental Burst

    Max first

  2. #2

    Elemental Skill

    Then

  3. #3

    Normal Attack

    Next

Teams

No composition on the site currently uses Sayu. The best teams page carries the ones that are written up.

Genshin Impact 4★ Anemo Claymore Healer

Sayu build summary

Updated August 22, 2026

Skyward Pride is the closest fit on the game's own numbers: Sayu's kit multiplies ATK, and a weapon is ranked here on whether its ascension stat and its passive act on that stat. The Unforged, "Ultimate Overlord's Mega Magic Sword" and Wolf's Gravestone come next. No playtested ranking has been imported for Sayu, so this is arithmetic over the kit data rather than a damage measurement.

Run Desert Pavilion Chronicle on Sayu, with Viridescent Venerer and Song of Days Past behind it. Main stats are ATK% sands, ATK% goblet, Healing Bonus circlet. Roll substats in the order Energy Recharge > ATK% > CRIT Rate > CRIT DMG.

Talent priority is Elemental Burst > Elemental Skill > Normal Attack. The Elemental Burst costs 80 energy, which is what an Energy Recharge target has to clear.

Role
Healer / Support
Best weapon
Skyward Pride
Main stats
ATK% sands, ATK% goblet, Healing Bonus circlet
Substats priority
Energy Recharge > ATK% > CRIT Rate > CRIT DMG
Talent priority
Elemental Burst > Elemental Skill > Normal Attack
Burst energy cost
80 energy
Key ascension material
168× Crystal Marrow
Last updated
August 22, 2026

Combat talents

Sayu Shuumatsuban Ninja Blade — normal attack icon | Genshin Impact
Normal

Shuumatsuban Ninja Blade

Normal Attack Performs up to 4 consecutive strikes.

Charged Attack Drains Stamina over time to perform continuous spinning attacks against all nearby opponents. At the end of the sequence, performs a more powerful slash.

Plunging Attack Plunges from mid-air to strike the ground below, damaging opponents along the path and dealing AoE DMG upon impact.

Talent level

10 is the cap from materials; C3 and C5 add +3.

1-Hit DMG
142.8%
2-Hit DMG
141.1%
3-Hit DMG
85.9%+85.9%
4-Hit DMG
194.0%
Charged Attack Spinning DMG
123.6%
Charged Attack Final DMG
223.6%
Charged Attack Stamina Cost
40.0/s
Max Duration
5.0s
Plunge DMG
147.4%
Low/High Plunge DMG
294.8%/368.2%
All 15 levels
Attribute123456789101112131415
1-Hit DMG72.2%78.1%84.0%92.4%98.3%105.0%114.2%123.5%132.7%142.8%154.4%167.9%181.5%195.1%209.9%
2-Hit DMG71.4%77.2%83.0%91.3%97.1%103.8%112.9%122.0%131.1%141.1%152.5%165.9%179.4%192.8%207.4%
3-Hit DMG43.4%+43.4%47.0%+47.0%50.5%+50.5%55.5%+55.5%59.1%+59.1%63.1%+63.1%68.7%+68.7%74.2%+74.2%79.8%+79.8%85.9%+85.9%92.8%+92.8%101.0%+101.0%109.1%+109.1%117.3%+117.3%126.2%+126.2%
4-Hit DMG98.1%106.1%114.1%125.5%133.5%142.6%155.2%167.7%180.3%194.0%209.7%228.1%246.6%265.0%285.1%
Charged Attack Spinning DMG62.5%67.6%72.7%80.0%85.1%90.9%98.9%106.9%114.9%123.6%133.6%145.4%157.2%168.9%181.7%
Charged Attack Final DMG113.1%122.3%131.5%144.6%153.9%164.4%178.8%193.3%207.8%223.6%241.6%262.9%284.2%305.4%328.6%
Charged Attack Stamina Cost40.0/s40.0/s40.0/s40.0/s40.0/s40.0/s40.0/s40.0/s40.0/s40.0/s40.0/s40.0/s40.0/s40.0/s40.0/s
Max Duration5.0s5.0s5.0s5.0s5.0s5.0s5.0s5.0s5.0s5.0s5.0s5.0s5.0s5.0s5.0s
Plunge DMG74.6%80.7%86.7%95.4%101.5%108.4%118.0%127.5%137.0%147.4%157.8%168.3%178.7%189.1%199.5%
Low/High Plunge DMG149.1%/186.3%161.3%/201.5%173.4%/216.6%190.8%/238.3%202.9%/253.4%216.8%/270.8%235.9%/294.6%254.9%/318.4%274.0%/342.3%294.8%/368.2%315.6%/394.2%336.4%/420.2%357.3%/446.2%378.1%/472.2%398.9%/498.2%
Sayu Yoohoo Art: Fuuin Dash — elemental skill icon | Genshin Impact
Skill

Yoohoo Art: Fuuin Dash

The special technique of the Yoohoo Ninja Arts! Sayu curls up into a rolling Fuufuu Windwheel and smashes into opponents at high speed, dealing Anemo DMG. When the duration ends, she unleashes a Fuufuu Whirlwind Kick, dealing AoE Anemo DMG.

Press Enters the Fuufuu Windwheel state, rolling forward a short distance before using the Fuufuu Whirlwind Kick.

Hold Rolls about continuously in the Fuufuu Windwheel state, increasing Sayu's resistance to interruption while within that state. During this time, Sayu can control the direction of her roll, and can use the skill again to end her Windwheel state early and unleash a stronger version of the Fuufuu Whirlwind Kick. The Hold version of this skill can trigger Elemental Absorption.

This skill has a maximum duration of 10s and enters CD once its effects end. The longer Sayu remains in her Windwheel state, the longer the CD.

Elemental Absorption If Sayu comes into contact with Hydro/Pyro/Cryo/Electro while in her Windwheel state, she will deal additional elemental DMG of that type. Elemental Absorption may only occur once per use of this skill.

Sayu can pull this skill off with her eyes closed. This technique was originally created for escaping, but now that she's got a Vision, might as well make her foes eat dirt while she's at it.

Talent level

10 is the cap from materials; C3 and C5 add +3.

Fuufuu Windwheel DMG
64.8%
Fuufuu Whirlwind Kick Press DMG
285.1%
Fuufuu Whirlwind Kick Hold DMG
391.7%
Fuufuu Windwheel Elemental DMG
30.2%
Fuufuu Whirlwind Kick Elemental DMG
137.1%
Max Duration (Hold)
10.0s
CD
6.0 to 11.0s
All 15 levels
Attribute123456789101112131415
Fuufuu Windwheel DMG36.0%38.7%41.4%45.0%47.7%50.4%54.0%57.6%61.2%64.8%68.4%72.0%76.5%81.0%85.5%
Fuufuu Whirlwind Kick Press DMG158.4%170.3%182.2%198.0%209.9%221.8%237.6%253.4%269.3%285.1%301.0%316.8%336.6%356.4%376.2%
Fuufuu Whirlwind Kick Hold DMG217.6%233.9%250.2%272.0%288.3%304.6%326.4%348.2%369.9%391.7%413.4%435.2%462.4%489.6%516.8%
Fuufuu Windwheel Elemental DMG16.8%18.1%19.3%21.0%22.3%23.5%25.2%26.9%28.6%30.2%31.9%33.6%35.7%37.8%39.9%
Fuufuu Whirlwind Kick Elemental DMG76.2%81.9%87.6%95.2%100.9%106.6%114.2%121.9%129.5%137.1%144.7%152.3%161.8%171.4%180.9%
Max Duration (Hold)10.0s10.0s10.0s10.0s10.0s10.0s10.0s10.0s10.0s10.0s10.0s10.0s10.0s10.0s10.0s
CD6.0 to 11.0s6.0 to 11.0s6.0 to 11.0s6.0 to 11.0s6.0 to 11.0s6.0 to 11.0s6.0 to 11.0s6.0 to 11.0s6.0 to 11.0s6.0 to 11.0s6.0 to 11.0s6.0 to 11.0s6.0 to 11.0s6.0 to 11.0s6.0 to 11.0s
Sayu Yoohoo Art: Mujina Flurry — elemental burst icon | Genshin Impact
Burst

Yoohoo Art: Mujina Flurry

The other super special technique of the Yoohoo Ninja Arts! It summons a pair of helping hands for Sayu. Deals Anemo DMG to nearby opponents and heals all nearby party members. The amount of HP restored is based on Sayu's ATK. This skill then summons a Muji-Muji Daruma.

Muji-Muji Daruma At specific intervals, the Daruma will take one of several actions based on the situation around it: · If the HP of nearby characters is above 70%, it will attack a nearby opponent, dealing Anemo DMG. · If there are active characters with 70% or less HP nearby, it will heal the active character with the lowest percentage HP left. If there are no opponents nearby, it will heal active characters nearby even if they have 70% HP or more.

People who don't know the first thing about ninjutsu love to watch Sayu show off this skill, and some have tried to learn it from her. But Sayu just wants to sleep and not be disturbed.

Talent level

10 is the cap from materials; C3 and C5 add +3.

Skill Activation DMG
210.2%
Skill Activation Healing
165.9% ATK+1270
Muji-Muji Daruma DMG
93.6%
Muji-Muji Daruma Healing
143.8% ATK+1101
Duration
12.0s
CD
20.0s
Energy Cost
80
All 15 levels
Attribute123456789101112131415
Skill Activation DMG116.8%125.6%134.3%146.0%154.8%163.5%175.2%186.9%198.6%210.2%221.9%233.6%248.2%262.8%277.4%
Skill Activation Healing92.2% ATK+57799.1% ATK+635106.0% ATK+698115.2% ATK+765122.1% ATK+837129.0% ATK+914138.2% ATK+996147.5% ATK+1083156.7% ATK+1174165.9% ATK+1270175.1% ATK+1371184.3% ATK+1477195.8% ATK+1588207.4% ATK+1703218.9% ATK+1824
Muji-Muji Daruma DMG52.0%55.9%59.8%65.0%68.9%72.8%78.0%83.2%88.4%93.6%98.8%104.0%110.5%117.0%123.5%
Muji-Muji Daruma Healing79.9% ATK+50085.9% ATK+55091.9% ATK+60599.8% ATK+663105.8% ATK+726111.8% ATK+792119.8% ATK+863127.8% ATK+938135.8% ATK+1017143.8% ATK+1101151.8% ATK+1188159.7% ATK+1280169.7% ATK+1376179.7% ATK+1476189.7% ATK+1580
Duration12.0s12.0s12.0s12.0s12.0s12.0s12.0s12.0s12.0s12.0s12.0s12.0s12.0s12.0s12.0s
CD20.0s20.0s20.0s20.0s20.0s20.0s20.0s20.0s20.0s20.0s20.0s20.0s20.0s20.0s20.0s
Energy Cost808080808080808080808080808080

Passives

Sayu Someone More Capable — passive icon | Genshin Impact
Passive

Someone More Capable

When Sayu triggers a Swirl or Stellar Swirl reaction while active, she heals all your characters and nearby allies for 300 HP. She will also heal an additional 1.2 HP for every point of Elemental Mastery she has. This effect can be triggered once every 2s.

Sayu No Work Today! — passive icon | Genshin Impact
Passive

No Work Today!

The Muji-Muji Daruma created by Yoohoo Art: Mujina Flurry gains the following effects: · When healing a character, it will also heal characters near that healed character for 20% the amount of HP. · Increases the AoE of its attack against opponents.

Sayu Yoohoo Art: Silencer's Secret — passive icon | Genshin Impact
Passive

Yoohoo Art: Silencer's Secret

When Sayu is in the party, your characters will not startle Crystalflies and certain other animals when getting near them. Check the "Other" sub-category of the "Living Beings / Wildlife" section in the Archive for creatures this skill works on.

Full bill

Level 90 and every talent to 10

5,377,500

Mora 17 material lines

Ascension to 90

420,000

Mora 9 materials · 6 steps

All 3 talents to 10

4,957,500

Mora 3× the single-talent bill

Ascension

  1. Lv 40
    Vayuda Turquoise Sliver — ascension material | Genshin ImpactVayuda Turquoise Sliver ×1
    Crystal Marrow — ascension material | Genshin ImpactCrystal Marrow ×3
    Whopperflower Nectar — ascension material | Genshin ImpactWhopperflower Nectar ×3

    20,000Mora

  2. Lv 50
    Marionette Core — ascension material | Genshin ImpactMarionette Core ×2
    Vayuda Turquoise Fragment — ascension material | Genshin ImpactVayuda Turquoise Fragment ×3
    Crystal Marrow — ascension material | Genshin ImpactCrystal Marrow ×10
    Whopperflower Nectar — ascension material | Genshin ImpactWhopperflower Nectar ×15

    40,000Mora

  3. Lv 60
    Marionette Core — ascension material | Genshin ImpactMarionette Core ×4
    Vayuda Turquoise Fragment — ascension material | Genshin ImpactVayuda Turquoise Fragment ×6
    Shimmering Nectar — ascension material | Genshin ImpactShimmering Nectar ×12
    Crystal Marrow — ascension material | Genshin ImpactCrystal Marrow ×20

    60,000Mora

  4. Lv 70
    Marionette Core — ascension material | Genshin ImpactMarionette Core ×8
    Vayuda Turquoise Chunk — ascension material | Genshin ImpactVayuda Turquoise Chunk ×3
    Shimmering Nectar — ascension material | Genshin ImpactShimmering Nectar ×18
    Crystal Marrow — ascension material | Genshin ImpactCrystal Marrow ×30

    80,000Mora

  5. Lv 80
    Marionette Core — ascension material | Genshin ImpactMarionette Core ×12
    Vayuda Turquoise Chunk — ascension material | Genshin ImpactVayuda Turquoise Chunk ×6
    Energy Nectar — ascension material | Genshin ImpactEnergy Nectar ×12
    Crystal Marrow — ascension material | Genshin ImpactCrystal Marrow ×45

    100,000Mora

  6. Lv 90
    Vayuda Turquoise Gemstone — ascension material | Genshin ImpactVayuda Turquoise Gemstone ×6
    Marionette Core — ascension material | Genshin ImpactMarionette Core ×20
    Energy Nectar — ascension material | Genshin ImpactEnergy Nectar ×24
    Crystal Marrow — ascension material | Genshin ImpactCrystal Marrow ×60

    120,000Mora

Total to level 90

420,000 Mora

Vayuda Turquoise Gemstone — ascension material | Genshin ImpactVayuda Turquoise Gemstone ×6
Marionette Core — ascension material | Genshin ImpactMarionette Core ×46
Vayuda Turquoise Chunk — ascension material | Genshin ImpactVayuda Turquoise Chunk ×9
Energy Nectar — ascension material | Genshin ImpactEnergy Nectar ×36
Vayuda Turquoise Fragment — ascension material | Genshin ImpactVayuda Turquoise Fragment ×9
Shimmering Nectar — ascension material | Genshin ImpactShimmering Nectar ×30
Vayuda Turquoise Sliver — ascension material | Genshin ImpactVayuda Turquoise Sliver ×1
Crystal Marrow — ascension material | Genshin ImpactCrystal Marrow ×168
Whopperflower Nectar — ascension material | Genshin ImpactWhopperflower Nectar ×18

Talent materials

  1. → 2
    Teachings of Light — ascension material | Genshin ImpactTeachings of Light ×3
    Whopperflower Nectar — ascension material | Genshin ImpactWhopperflower Nectar ×6

    12,500Mora

  2. → 3
    Guide to Light — ascension material | Genshin ImpactGuide to Light ×2
    Shimmering Nectar — ascension material | Genshin ImpactShimmering Nectar ×3

    17,500Mora

  3. → 4
    Guide to Light — ascension material | Genshin ImpactGuide to Light ×4
    Shimmering Nectar — ascension material | Genshin ImpactShimmering Nectar ×4

    25,000Mora

  4. → 5
    Guide to Light — ascension material | Genshin ImpactGuide to Light ×6
    Shimmering Nectar — ascension material | Genshin ImpactShimmering Nectar ×6

    30,000Mora

  5. → 6
    Guide to Light — ascension material | Genshin ImpactGuide to Light ×9
    Shimmering Nectar — ascension material | Genshin ImpactShimmering Nectar ×9

    37,500Mora

  6. → 7
    Gilded Scale — ascension material | Genshin ImpactGilded Scale ×1
    Philosophies of Light — ascension material | Genshin ImpactPhilosophies of Light ×4
    Energy Nectar — ascension material | Genshin ImpactEnergy Nectar ×4

    120,000Mora

  7. → 8
    Gilded Scale — ascension material | Genshin ImpactGilded Scale ×1
    Philosophies of Light — ascension material | Genshin ImpactPhilosophies of Light ×6
    Energy Nectar — ascension material | Genshin ImpactEnergy Nectar ×6

    260,000Mora

  8. → 9
    Gilded Scale — ascension material | Genshin ImpactGilded Scale ×2
    Philosophies of Light — ascension material | Genshin ImpactPhilosophies of Light ×12
    Energy Nectar — ascension material | Genshin ImpactEnergy Nectar ×9

    450,000Mora

  9. → 10
    Crown of Insight — ascension material | Genshin ImpactCrown of Insight ×1
    Gilded Scale — ascension material | Genshin ImpactGilded Scale ×2
    Philosophies of Light — ascension material | Genshin ImpactPhilosophies of Light ×16
    Energy Nectar — ascension material | Genshin ImpactEnergy Nectar ×12

    700,000Mora

One talent to 10

1,652,500 Mora

Crown of Insight — ascension material | Genshin ImpactCrown of Insight ×1
Gilded Scale — ascension material | Genshin ImpactGilded Scale ×6
Philosophies of Light — ascension material | Genshin ImpactPhilosophies of Light ×38
Energy Nectar — ascension material | Genshin ImpactEnergy Nectar ×31
Guide to Light — ascension material | Genshin ImpactGuide to Light ×21
Shimmering Nectar — ascension material | Genshin ImpactShimmering Nectar ×22
Teachings of Light — ascension material | Genshin ImpactTeachings of Light ×3
Whopperflower Nectar — ascension material | Genshin ImpactWhopperflower Nectar ×6

All 3 talents to 10

4,957,500 Mora

Crown of Insight — ascension material | Genshin ImpactCrown of Insight ×3
Gilded Scale — ascension material | Genshin ImpactGilded Scale ×18
Philosophies of Light — ascension material | Genshin ImpactPhilosophies of Light ×114
Energy Nectar — ascension material | Genshin ImpactEnergy Nectar ×93
Guide to Light — ascension material | Genshin ImpactGuide to Light ×63
Shimmering Nectar — ascension material | Genshin ImpactShimmering Nectar ×66
Teachings of Light — ascension material | Genshin ImpactTeachings of Light ×9
Whopperflower Nectar — ascension material | Genshin ImpactWhopperflower Nectar ×18

Sayu’s constellation — Nyctereutes Minor

  1. Sayu C1 Multi-Task no Jutsu — constellation | Genshin ImpactC1

    Multi-Task no Jutsu

    The Muji-Muji Daruma created by Yoohoo Art: Mujina Flurry will ignore HP limits and can simultaneously attack nearby opponents and heal characters.

  2. Sayu C2 Egress Prep — constellation | Genshin ImpactC2

    Egress Prep

    Yoohoo Art: Fuuin Dash gains the following effects: · DMG of Fuufuu Whirlwind Kick in Press Mode increased by 3.3%. · Every 0.5s in the Fuufuu Windwheel state will increase the DMG of this Fuufuu Whirlwind Kick by 3.3%. The maximum DMG increase possible through this method is 66%.

  3. Sayu C3 Eh, the Bunshin Can Handle It — constellation | Genshin ImpactC3

    Eh, the Bunshin Can Handle It

    Increases the Level of Yoohoo Art: Mujina Flurry by 3. Maximum upgrade level is 15.

  4. Sayu C4 Skiving: New and Improved — constellation | Genshin ImpactC4

    Skiving: New and Improved

    Sayu recovers 1.2 Energy when she triggers a Swirl or Stellar Swirl reaction while on-field. This effect occurs once every 2s.

  5. Sayu C5 Speed Comes First — constellation | Genshin ImpactC5

    Speed Comes First

    Increases the Level of Yoohoo Art: Fuuin Dash by 3. Maximum upgrade level is 15.

  6. Sayu C6 Sleep O'Clock — constellation | Genshin ImpactC6

    Sleep O'Clock

    The Muji-Muji Daruma created by Sayu's Yoohoo Art: Mujina Flurry will now also benefit from her Elemental Mastery. Each point of Sayu's Elemental Mastery will produce the following effects: · Increases the damage dealt by the Muji-Muji Daruma's attacks by 0.2% ATK. A maximum DMG increase of 400% ATK can be gained via this method. · Increases the HP restored by the Muji-Muji Daruma by 3. A maximum of 6,000 additional HP can be restored in this manner.

Sayu’s outfits

  • Sayu — Mini Mujina outfit | Genshin Impact
    Default

    Mini Mujina

    Sayu's outfit. Marvelous attire designed after the mysterious animal known as the Mujina.

Names, descriptions and art from the game data. Pick an outfit on the stage to see it full size.

Sayu FAQ

What element is Sayu?
Sayu is a 4-star Anemo character from Inazuma who uses a claymore, released in version 2.0.
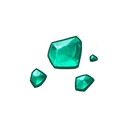
What stat does Sayu scale on?
Sayu's abilities multiply ATK. That is read from the scaling rows on the Elemental Skill and Burst, not from the ability description, so it reflects what the game actually multiplies rather than what the text mentions.
What is the best weapon for Sayu?
Skyward Pride is the closest fit on the data: it is a 5-star claymore with Energy Recharge as its ascension stat, and its passive acts on ATK. "Ultimate Overlord's Mega Magic Sword" is the best 4-star alternative.
Which artifact set should Sayu use?
Desert Pavilion Chronicle. Its 2-piece bonus is: Anemo DMG Bonus +15% Its 4-piece bonus is: When Charged Attacks hit opponents, the equipping character's Normal Attack SPD will increase by 10% while Normal, Charged, and Plunging Attack DMG will increase by 40% for 15s.
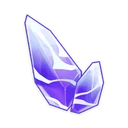
How much does it cost to level Sayu's talents?
Taking one talent from level 1 to 10 costs 1,652,500 Mora and 38× Philosophies of Light among other materials. The Materials tab lists every item per level.
What does Sayu C1 do?
Multi-Task no Jutsu: The Muji-Muji Daruma created by Yoohoo Art: Mujina Flurry will ignore HP limits and can simultaneously attack nearby opponents and heal characters.
GENSHIN-BUILD.COM
AboutPrivacy PolicyAdvertiseData as of version 7.0

Genshin Build is an unofficial fan resource. Genshin Impact, its game content and its artwork are trademarks and copyrights of HoYoverse. This site is not affiliated with or endorsed by HoYoverse.